Implementasi On-Demand Incremental Static Regeneration (ISR) dengan Next.js
On-Demand Incremental Static Regeneration hanya akan melakukan build jika ada trigger. Sedangkan, Incremental Static Regeneration biasa akan terus menerus melakukan build sesuai revalidate yang telah ditentukan.
Next.js adalah open source React framework yang sangat populer. Next.js mempunyai fitur unggulan seperti strategi data fetching yang dapat kita sesuaikan dengan kebutuhan aplikasi yang kita buat. Ada Static Site Generation (SSG), Server Side Rendering (SSR), Incremental static regeneration (ISR), dan Client Side Rendering (CSR).
Wah, banyak banget ya. Apaan tuh pengertian dari setiap strategi data fetching tersebut? Biar lebih jelas, coba tonton video dibawah ini!
Sudah lumayan ngerti kan perbedaan dari setiap strategi data fetching tersebut? Kalau sudah kita lanjut ke pembahasan On-Demand ISR.
On-Demand Incremental Static Regeneration (ISR)
Memang apa sih perbedaan nya On-Demand ISR dengan ISR biasa? Perbedaan nya ada adalah kapan page yang sudah digenerate secara static saat build time akan revalidate . Dengan ISR biasa kita perlu menambahkan props revalidate untuk menentukan kapan page akan re-generate. Lebih lengkap nya bisa lihat potongan kode dibawah ini.
export async function getStaticProps() {
	const res = await fetch('https://.../posts')
	const posts = await res.json()
	return {
		props: {
			posts
		},
		// Next.js will attempt to re-generate the page:
		// - When a request comes in
		// - At most once every 10 seconds
		revalidate: 10, // In seconds
}}
revalidate: 10 menunjukan bahwa page akan re-generate per 10 detik. Sedangkan, On Demand ISR tidak memerlukan props revalidate. Terus gimana caranya page tersebut dapat di-update? Sesuai namanya "On-Demand" page akan di-update jika ada trigger / request yang meminta halaman tersebut untuk revalidate. Yuk kita bahas cara implementasinya!
Implementasi On-Demand ISR
Implementasi On-Demand ISR akan kita coba gunakan dengan webhook strapi sebagai trigger untuk revalidate halaman di aplikasi Next.js kita. Berikut ini langkah-langkahnya
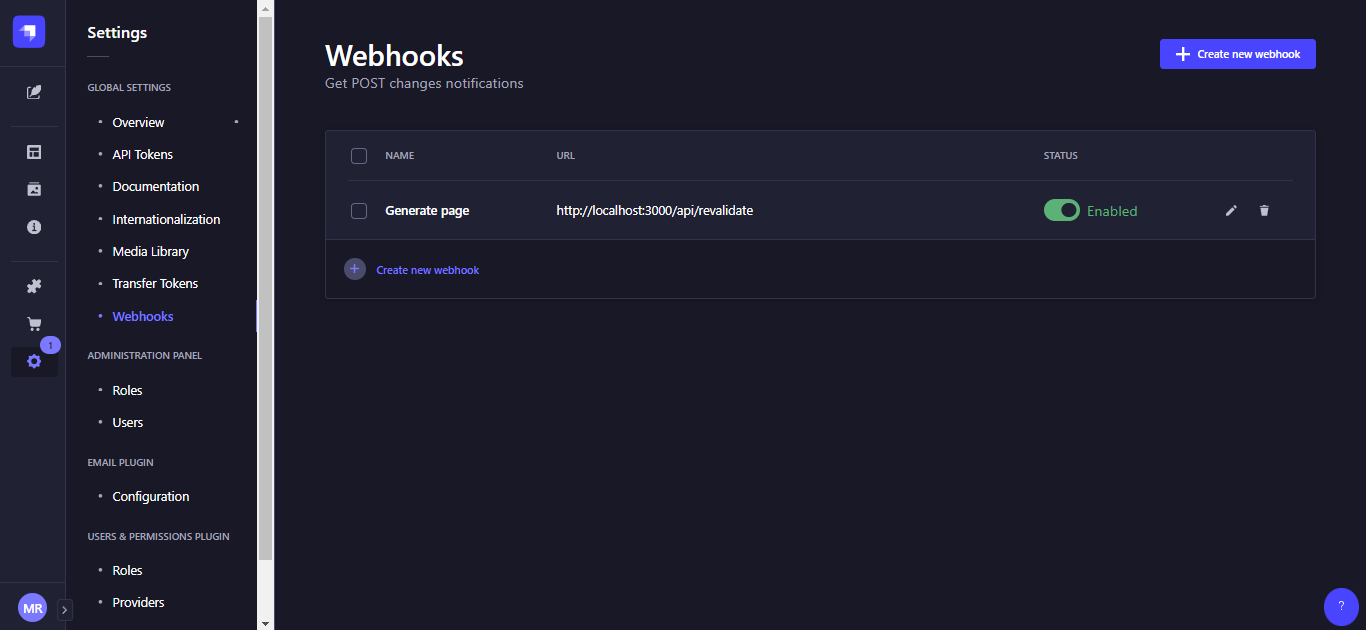
Setup Webhook di Strapi
Klik menu settings lalu pilih webhooks di bagian GLOBAL SETTINGS. Gambar dibawah ini menunjukan halaman untuk mengelola Webhooks di Strapi. Saya sudah punya satu karena sebelumnya telah punya.
Klik create new Webhooks
Lalu akan muncul halaman seperti ini
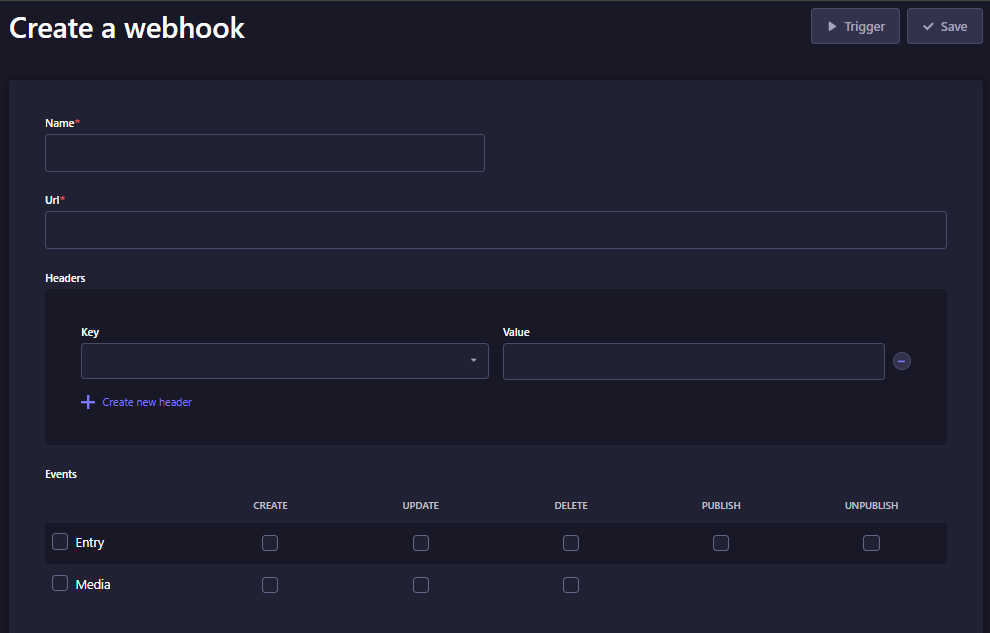
Berikut ini merupakan penjelasan dari field form diatas
| Field | Deskripsi | Contoh isi |
|---|---|---|
| Name | Nama webhook yang kita buat | Revalidate |
| URL | URL aplikasi Next.js untuk handle webhook | http://localhost:3000/api/revalidate Nanti kita bikin file revalidate ini di Next.js |
| Headers | Header yang dikirim ke aplikasi Next.js | key = x-webhook-secret value = buat pakai command openssl rand -base64 32 lalu copy hasilnya header ini dipakai buat tambahan security. Biar orang lain ngga bisa akses. |
| Event | Tentuin kapan Webhook yang kita buat akan trigger revalidate Next.js | Ceklis semua |
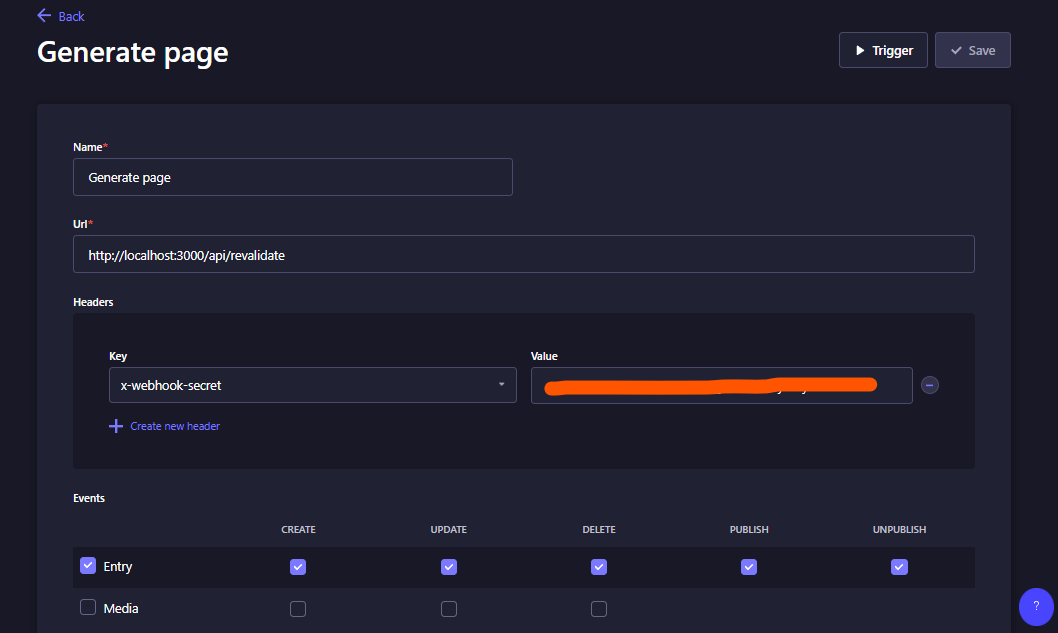
Contoh yang sudah diisi
Handle Webhook di Next.js
Selanjutnya kita buat file revalidate.ts di folder api atau sesuaikan dengan url yang sudah ditargetkan pada setting webhooks di Strapi.
Lalu buat file .env yang isinya secret token.
Buat type untuk response sama request. Kalau ngga pakai typescript ngga usah buat ya. Contoh isi payload strapi bisa liat di halaman Payload Webhooks.
type handlerProps = {
  req: {
    headers: {
      'x-webhook-secret': string
    }
    body: {
      model: string
      entry: {
        id: string
      }
    }
  }
  res: {
    revalidate: (path: string) => Promise<void>
    status: (code: number) => {
      json: (data: { message: string; model?: string }) => void
      send: (data: string) => void
    }
  }
}
Buat fungsi handler nya
export default async function handler({ req, res }: handlerProps) {

  // Check for secret to confirm this is a valid request
  const secret = req.headers['x-webhook-secret']
  if (secret !== process.env.MY_SECRET_TOKEN) {
    return res.status(401).json({ message: 'Invalid token' })
  }

  try {
    const { model } = req?.body
    // this should be the actual path not a rewritten path
    // e.g. for "/blog/[slug]" this should be "/blog/post-1"
    switch (model) {
      case 'homepage':
        await res.revalidate('/')
        break
      case 'blog':
        await res.revalidate('/blog')
        break
      default:
        console.log('default')
        break
    }
    console.log('revalidate success')

    return res.status(200).json({ message: 'Revalidated', model: model || '' })

  } catch (err) {
    // If there was an error, Next.js will continue
    // to show the last successfully generated page
    return res.status(500).send('Error revalidating')
  }
}
Ok ini penjelasannya
Di bagian ini, kita cek apakah secret yang ada di header itu cocok dengan secret yang di .env
  // Check for secret to confirm this is a valid request
  const secret = req.headers['x-webhook-secret']
  if (secret !== process.env.MY_SECRET_TOKEN) {
    return res.status(401).json({ message: 'Invalid token' })
  }
Jika cocok, kita mapping apa nama model yang membuat event sehingga webhooks melakukan trigger dan revalidate halaman yang sekiranya perlu di-update jika model tersebut ada perubahan. Misalnya, kita update blog dan halaman /blog perlu revalidate ulang untuk menampilkan data blog terbaru.
try {
    const { model } = req?.body
    // this should be the actual path not a rewritten path
    // e.g. for "/blog/[slug]" this should be "/blog/post-1"
    switch (model) {
      case 'homepage':
        await res.revalidate('/')
        break
      case 'blog':
        await res.revalidate('/blog')
        break
      default:
        console.log('default')
        break
    }
    console.log('revalidate success')

    return res.status(200).json({ message: 'Revalidated', model: model || '' })

  } catch (err) {
    // If there was an error, Next.js will continue
    // to show the last successfully generated page
    return res.status(500).send('Error revalidating')
  }
}
kode keseluruhan
type handlerProps = {
  req: {
    headers: {
      'x-webhook-secret': string
    }
    body: {
      model: string
      entry: {
        id: string
      }
    }
  }

  res: {
    revalidate: (path: string) => Promise<void>
    status: (code: number) => {
      json: (data: { message: string; model?: string }) => void
      send: (data: string) => void
    }
  }
}

export default async function handler({ req, res }: handlerProps) {

  // Check for secret to confirm this is a valid request
  const secret = req.headers['x-webhook-secret']
  if (secret !== process.env.MY_SECRET_TOKEN) {
    return res.status(401).json({ message: 'Invalid token' })
  }

  try {
    const { model } = req?.body
    // this should be the actual path not a rewritten path
    // e.g. for "/blog/[slug]" this should be "/blog/post-1"
    switch (model) {
      case 'homepage':
        await res.revalidate('/')
        break
      case 'blog':
        await res.revalidate('/blog')
        break
      default:
        console.log('default')
        break
    }
    console.log('revalidate success')
    return res.status(200).json({ message: 'Revalidated', model: model || '' })
  } catch (err) {
    // If there was an error, Next.js will continue
    // to show the last successfully generated page
    return res.status(500).send('Error revalidating')
  }
}
Untuk mencoba nya secara langsung, jalankan command npm run build lalu npm run start. Setelah itu lakukan perubahan data di Strapi. Jika berhasil maka console akan memunculkan revalidate success dan halaman yang ditargetkan akan memunculkan konten terbaru setelah di-refresh.
atau coba Live demo On-Demand ISR Vercel
Selamat Mencoba!